your home for end-user virtualization!
Using ZFS filesystem as an NFS datastore for ESXi
Using ZFS on Linux is an attractive solution for a high-performance NFS server due to several key factors:
- Cost, ability to use commodity hardware with free software
- Simplicity, quick install and easy to configure/manage
- Flexibility, ZFS offers a plethora of options for your filesystem needs
In this case, I installed ZFS on CentOS 6.4 available here: http://isoredirect.centos.org/centos/6/isos/x86_64/
The hardware I used was a HP DL370 G6 with 11 3TB disks to be used for ZFS.
Disk /dev/sdc: 3000.6 GB, 3000559427584 bytes
Disk /dev/sdb: 3000.6 GB, 3000559427584 bytes
Disk /dev/sde: 3000.6 GB, 3000559427584 bytes
Disk /dev/sdd: 3000.6 GB, 3000559427584 bytes
Disk /dev/sdf: 3000.6 GB, 3000559427584 bytes
Disk /dev/sdh: 3000.6 GB, 3000559427584 bytes
Disk /dev/sdg: 3000.6 GB, 3000559427584 bytes
Disk /dev/sdi: 3000.6 GB, 3000559427584 bytes
Disk /dev/sdj: 3000.6 GB, 3000559427584 bytes
Disk /dev/sdk: 3000.6 GB, 3000559427584 bytes
Disk /dev/sdl: 3000.6 GB, 3000559427584 bytes
The next step after updating the system (yum -y update) is to install ZFS, I followed the instructions here: http://zfsonlinux.org/epel.html
yum localinstall --nogpgcheck http://archive.zfsonlinux.org/epel/zfs-release-1-2.el6.noarch.rpm
yum install zfs
The next step is to install the ZFS module (drivers) with the following command:
modprobe zfs
Now that you’ve installed the ZFS driver, lets make sure it loaded appropriately with the following command:
lsmod | grep zfs
The output should show the loaded ZFS modules as below:
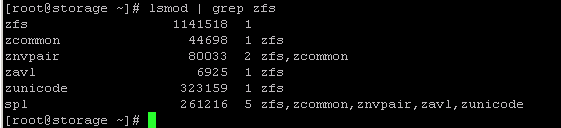
ZFS Modules Loaded
Now I want to create my ZFS array, to do that I need to find the device ID’s of my hard drives. Running the command:
fdisk -l | grep 3000.6
Gives me the list of the 3TB drives that I’m going to use for the ZFS array, the output looks like:
Disk /dev/sdc: 3000.6 GB, 3000559427584 bytes
Disk /dev/sdb: 3000.6 GB, 3000559427584 bytes
Disk /dev/sde: 3000.6 GB, 3000559427584 bytes
Disk /dev/sdd: 3000.6 GB, 3000559427584 bytes
Disk /dev/sdf: 3000.6 GB, 3000559427584 bytes
Disk /dev/sdh: 3000.6 GB, 3000559427584 bytes
Disk /dev/sdg: 3000.6 GB, 3000559427584 bytes
Disk /dev/sdi: 3000.6 GB, 3000559427584 bytes
Disk /dev/sdj: 3000.6 GB, 3000559427584 bytes
Disk /dev/sdk: 3000.6 GB, 3000559427584 bytes
Disk /dev/sdl: 3000.6 GB, 3000559427584 bytes
So now that I have the device ID’s, lets create the array using the ZFS RAIDZ raid-type.
RAIDZ (RAID5)
RAIDZ is very popular among many users because it gives you the best tradeoff of hardware failure protection vs useable storage. It is very similar to RAID5, but without the write-hole penalty that RAID5 encounters. The drawback is that when reading the checksum data, you are limited to basically the speed of one drive since the checksum data is spread across all drives in the zvol. This causes slowdowns when doing random reads of small chunks of data. It is very popular for storage archives where the data is written once and accessed infrequently.
Here we create the array named nfspool in raidz format, using devices sda-sdl
zpool create nfspool raidz sdd sdc sdb sde sdf sdg sdi sdk sdj sdh ddl
Then, we go ahead and create a filesystem on top of the array using:
zfs create nfspool/lun000
We then set the filesystem permissions for NFS:
chmod 777 /nfspool
chmod 777 /nfspool/lun000
Lets now share the ZFS filesystem using NFS (built-in to the filesystem!!!!)
zfs set sharenfs='rw=10.1.0.0/24,rw=10.0.0.0/24,all_squash' nfspool/lun000
Now lets start the ZFS-NFS share using:
zfs share -a
While your at it, go ahead and copy that same command into /etc/rc.local
Now for one minor performance tune!
zfs set sync=disabled nfspool/lun000
You should now then be able to mount your NFS mount via ESXi and write to it!
Using TCPtrack, I can then monitor my 10GB bond0 interface to see the transfer rates.

TCPtrack bond0
Gotta love the creator of TCPtrack, clearly a spaceballs fan
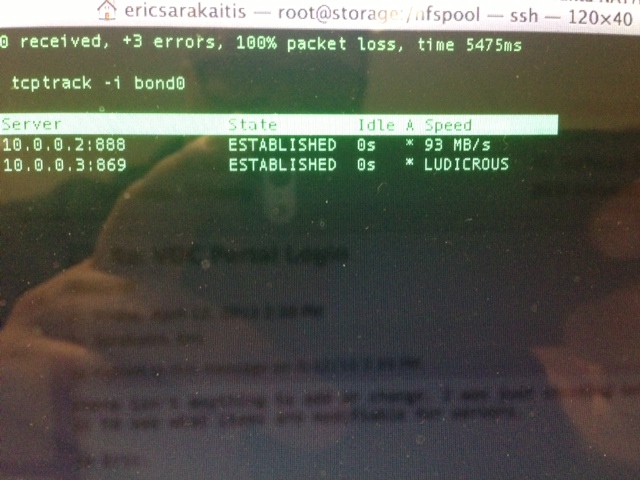
LUDICROUS SPEED!
Tags: attractive solution, CentOS, commodity hardware, datastore, device id, filesystem, free software, linux, NFS Datastore, ZFS